A step-by-step tutorial for 3 extensions in 1 project
by Walter Xie
Welcome to the step-by-step tutorial to implement a LPhy or LPhyBEAST extension. Before reading this tutorial, we suggest you learn some essential knowledges about Gradle, and know how IntelliJ IDEA integrates with Gradle. It is also helpful to understand the technial background, which is available in the system integration section.
1. Setup development environment
The development requires Java 17, Gradle, and IntelliJ. If you are not familiar with this step, please follow the tutorial to setup development environment and load your Gradle project into IntelliJ.
IntelliJ will automatically import modules and dependencies from the Gradle settings. Please do not try to change them through Project Structure in IntelliJ, because these changes might be lost after reimporting.
2. Establish a standard project structure
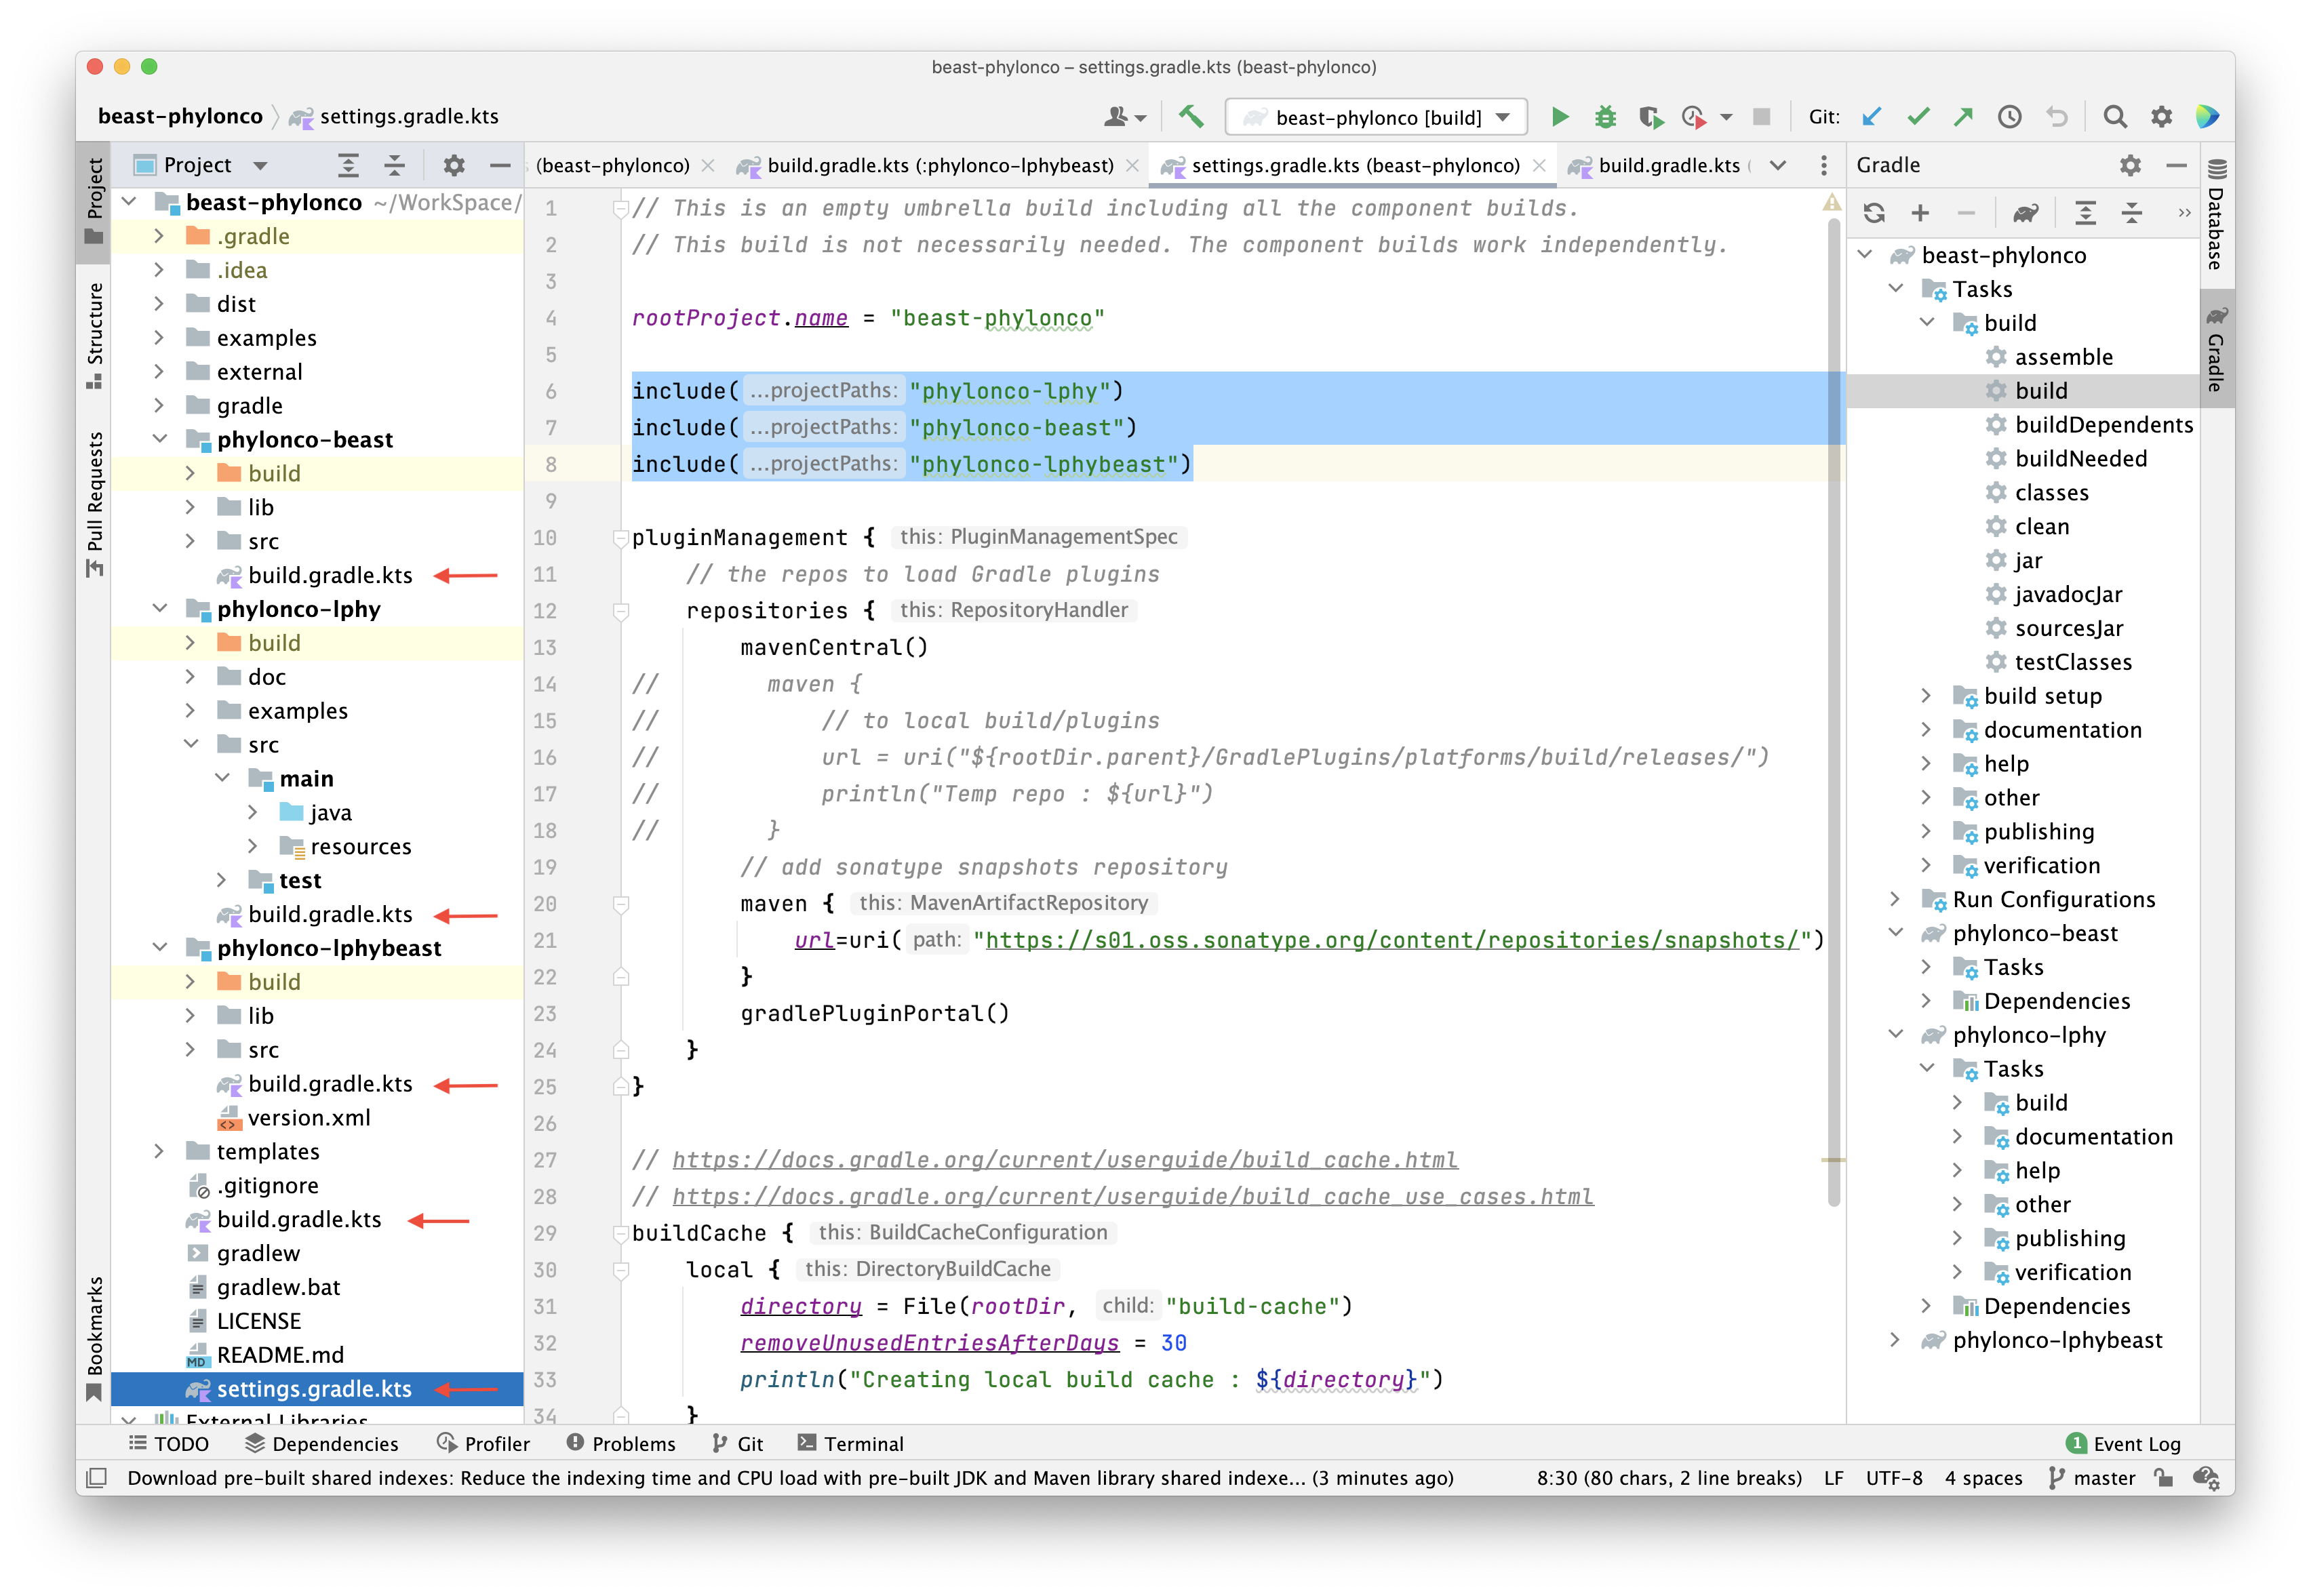
The extension project must be set to the standard Gradle directory structure. You can either create a Gradle project using IntelliJ, or simply copy the structure from an existing example, such as Phylonco, and then fill in your contents.
For example, in Figure 1, you need to rename the 3 subprojects (subfolders) to your subprojects,
which are phylonco-beast, phylonco-lphy, and phylonco-lphybeast.
Then replace their names inside include to yours,
which are highlighted in the settings.gradle.kts.
Please be aware that if you are migrating your existing projects,
you need to use either IntelliJ or git mv to move files, otherwise the history of files will be lost.
3. Fill in your project metadata
We are using composite builds.
In the project root, there is a settings.gradle.kts to configure this structure,
and a common build file build.gradle.kts to share build logics.
Furthermore, each subproject has its own build file.
They have been pointed by a red arrow in Figure 1.
You need to replace the project metadata in these files to your project information. The main changes are listed below, and click links to see where they are:
-
subprojects, please refer to section 2.
-
group, version and webpage, also the overwritten version.
-
manifest file in each jar, either the shared attribute or individual attributes, such as phylonco-beast build, phylonco-lphy build, and phylonco-lphybeast build.
-
Maven publication metadata, if you will publish to the Maven central repo.
The advanced tutorial Gradle project master - project structure will explain this in detail.
4. Dependency management
In this step, you need to configure the dependencies block for your subprojects.
First we recommend to use
module dependencies,
but this requires all libraries are published to the Maven central repo.
If this is unavailable, then you can consider to use
file dependencies,
which stores the released libraries in a lib folder in the repository and load them as files.
The significant drawbacks are that you have to manually validate their dependencies and update them.
Sometimes, if a subproject depends on another in the same repository,
you can import it using
project dependencies.
But we do not recommend this, if the subproject can be imported using module dependencies.
There are several types of
dependency configurations.
Each of them defines a specific scope for the dependencies declared in a Gradle project.
Please be aware of the key difference
between implementation and api,
and be respectful of consumers.
The advanced tutorial Gradle project master - dependencies will introduce the details of these concepts.
5. Java development
To create a LPhy extension, you need to create the
container provider class
under the package mypackage.lphy.spi to list all extended Java classes,
and register it in the module-info.java file.
The following posts explain how the core and extensions work in a technical level.
The advanced tutorial Java extension mechanism of LPhy and LPhyBEAST will demonstrate the usage of LPhy and LPhyBEAST extension mechanism.
6. Build the project
The output of basic tasks will be kept in a build folder created by each build.
For example, the libs contains all jar files, the distributions contains the zip or tar files,
and the reports and test-results contain unit test results.