Gradle project master --- project structure and dependencies
by Walter Xie
We will use the Phylonco project as an example, to demonstrate the standard Gradle project structure and also to learn some Gradle settings.
1. Project structure and project root configures
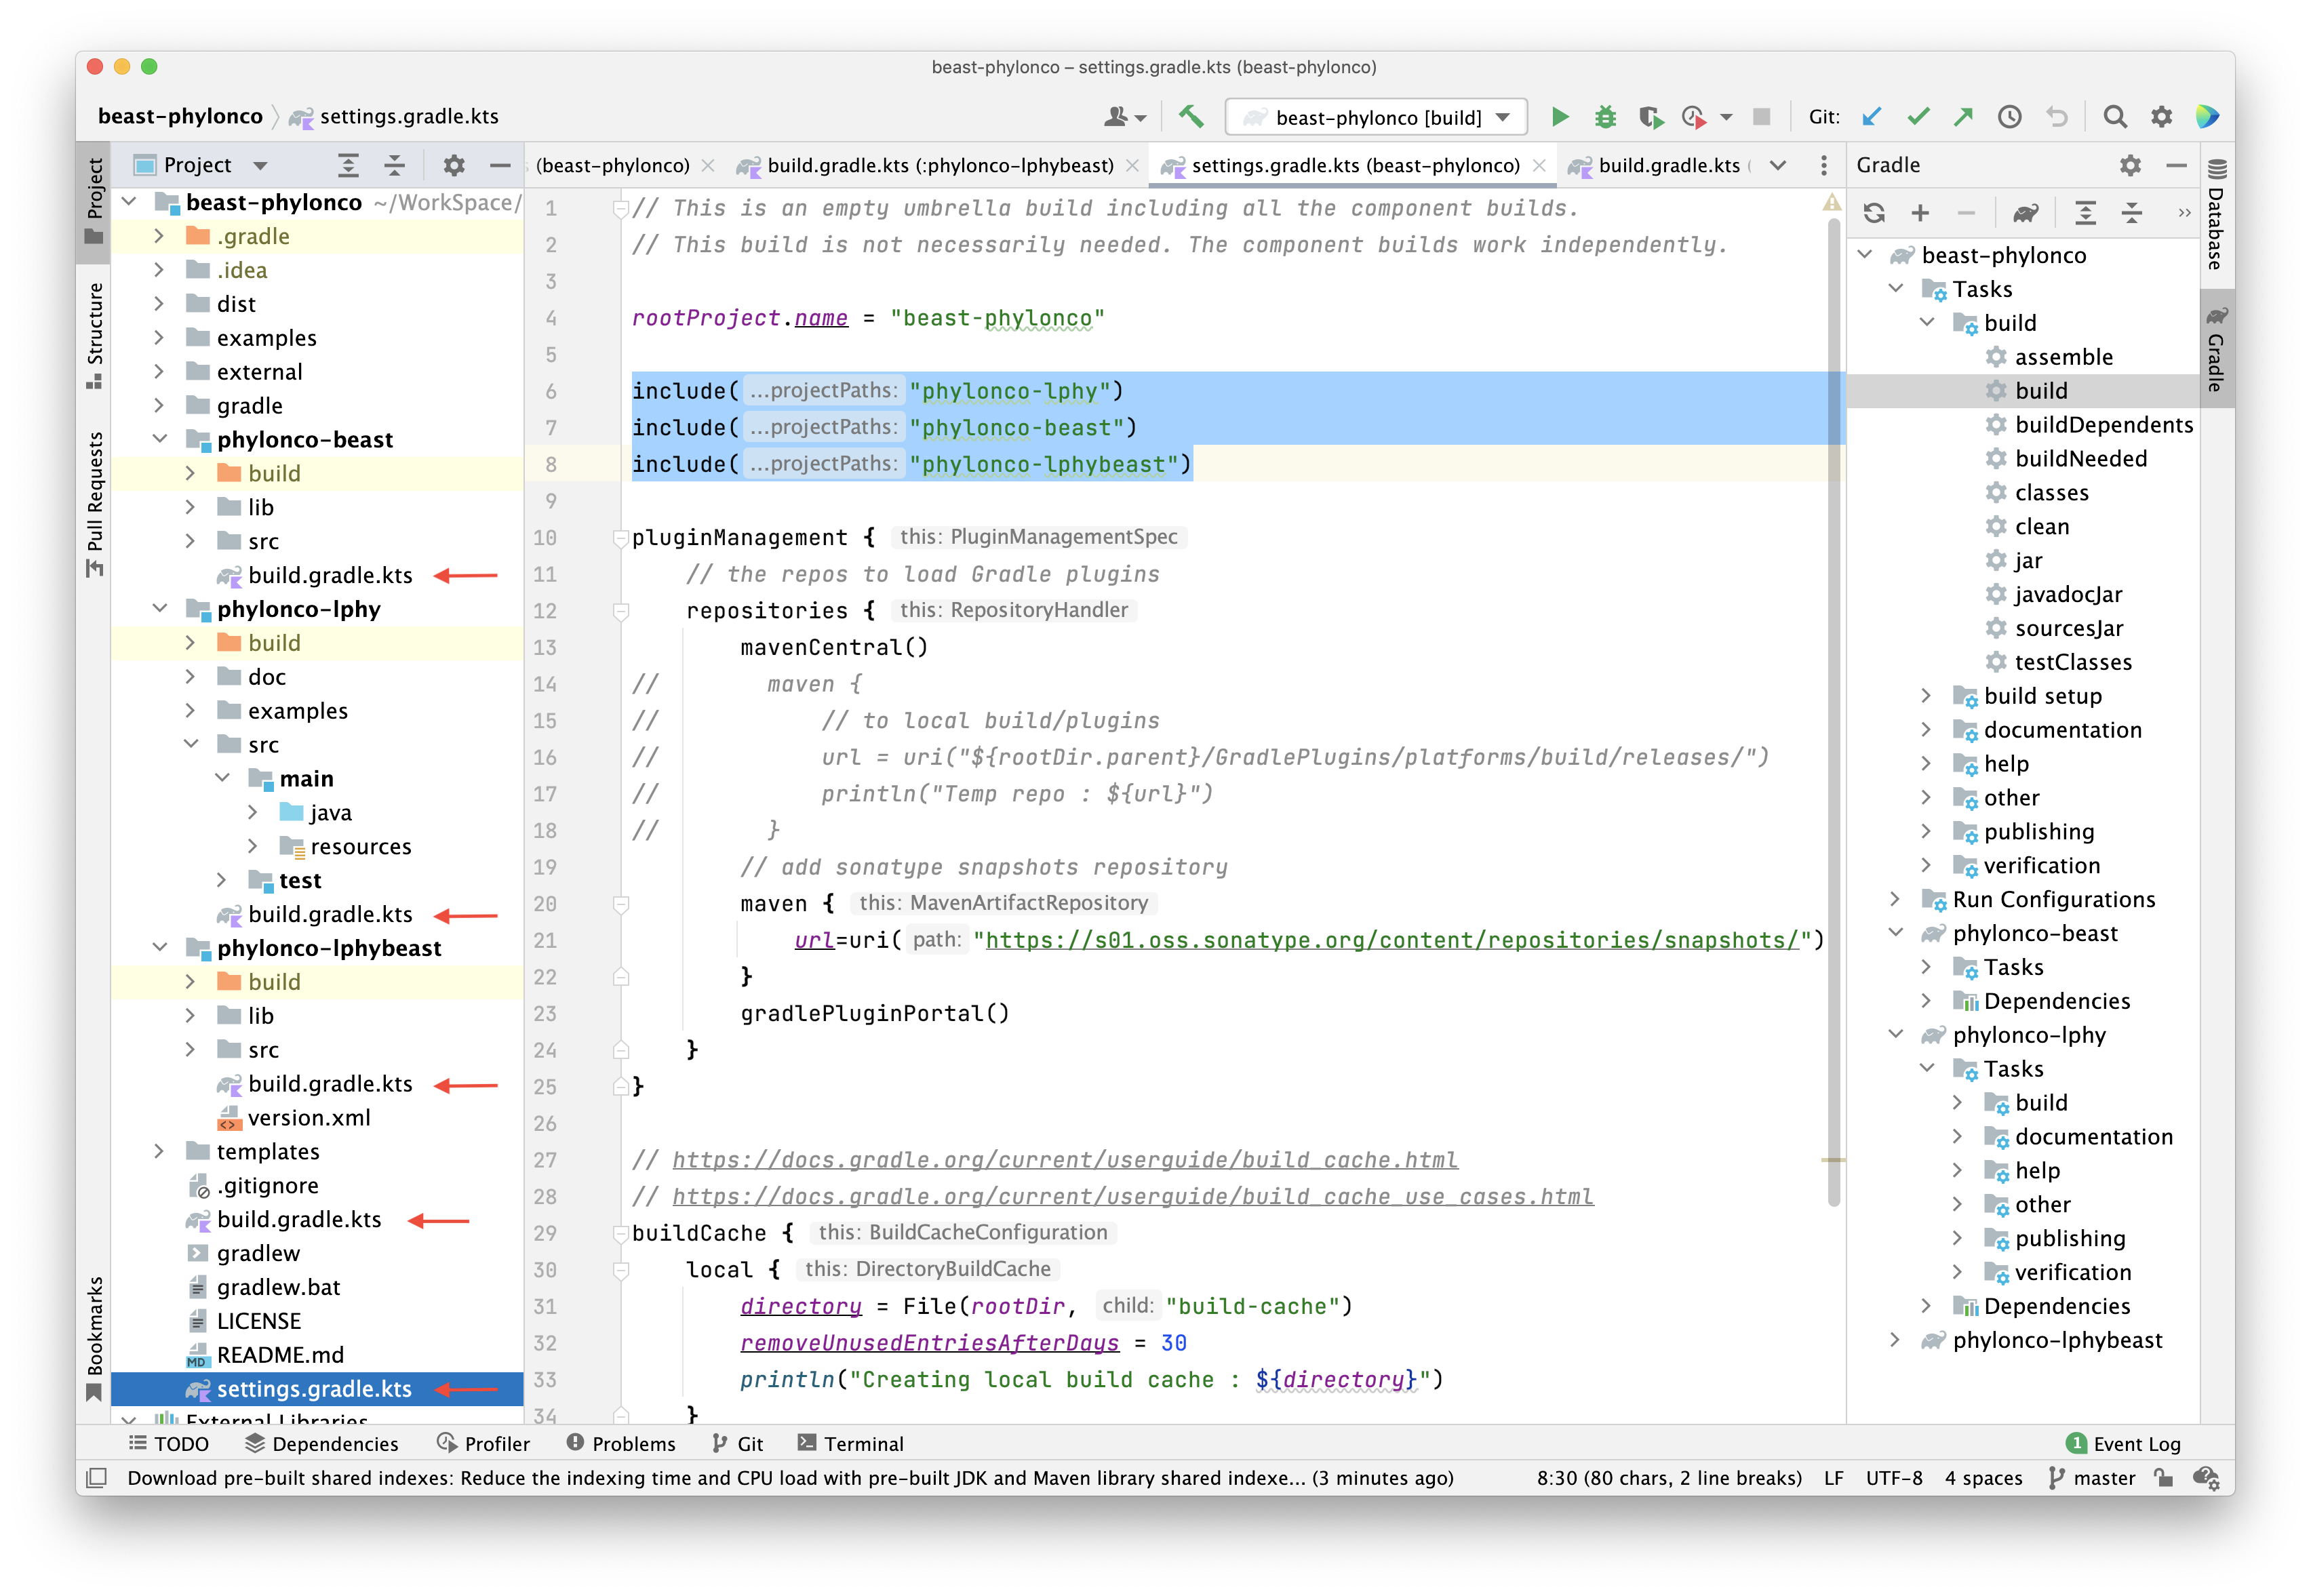
This project contains 3 modules, also known as
subprojects in Gradle.
Its project structure can be seen from the
project tool window
on the left side of Figure 1.
The file settings.gradle.kts in the project root configures this structure.
On the right of the figure, it configures the root project name which should be same as the Github repository name,
also same as the folder name.
The keyword include declares the 3 subprojects are included.
These subprojects’ names must be same as the subfolder names, which are bold in the project view.
IntelliJ will automatically create the modules according to this setting.
Sharing build between subprojects
The project root also has a common build file, which is used to define some shared build logics between subprojects. It often contains the project metadata. For example, the circled texts in Figure 2 assigns version to “0.0.6” and group to “io.github.bioDS” for all subprojects.
The group is one of critical configurations when you are publishing to the Maven central repo. It is recommended to use your Github organisation site name in a revised order. For example, the LPhy core is in the organisation “LinguaPhylo”, and the organisation site name is “linguaphylo.github.io”, so it is in the group io.github.linguaphylo. But you can overwrite the group or version in a subproject’s build, if they are different.
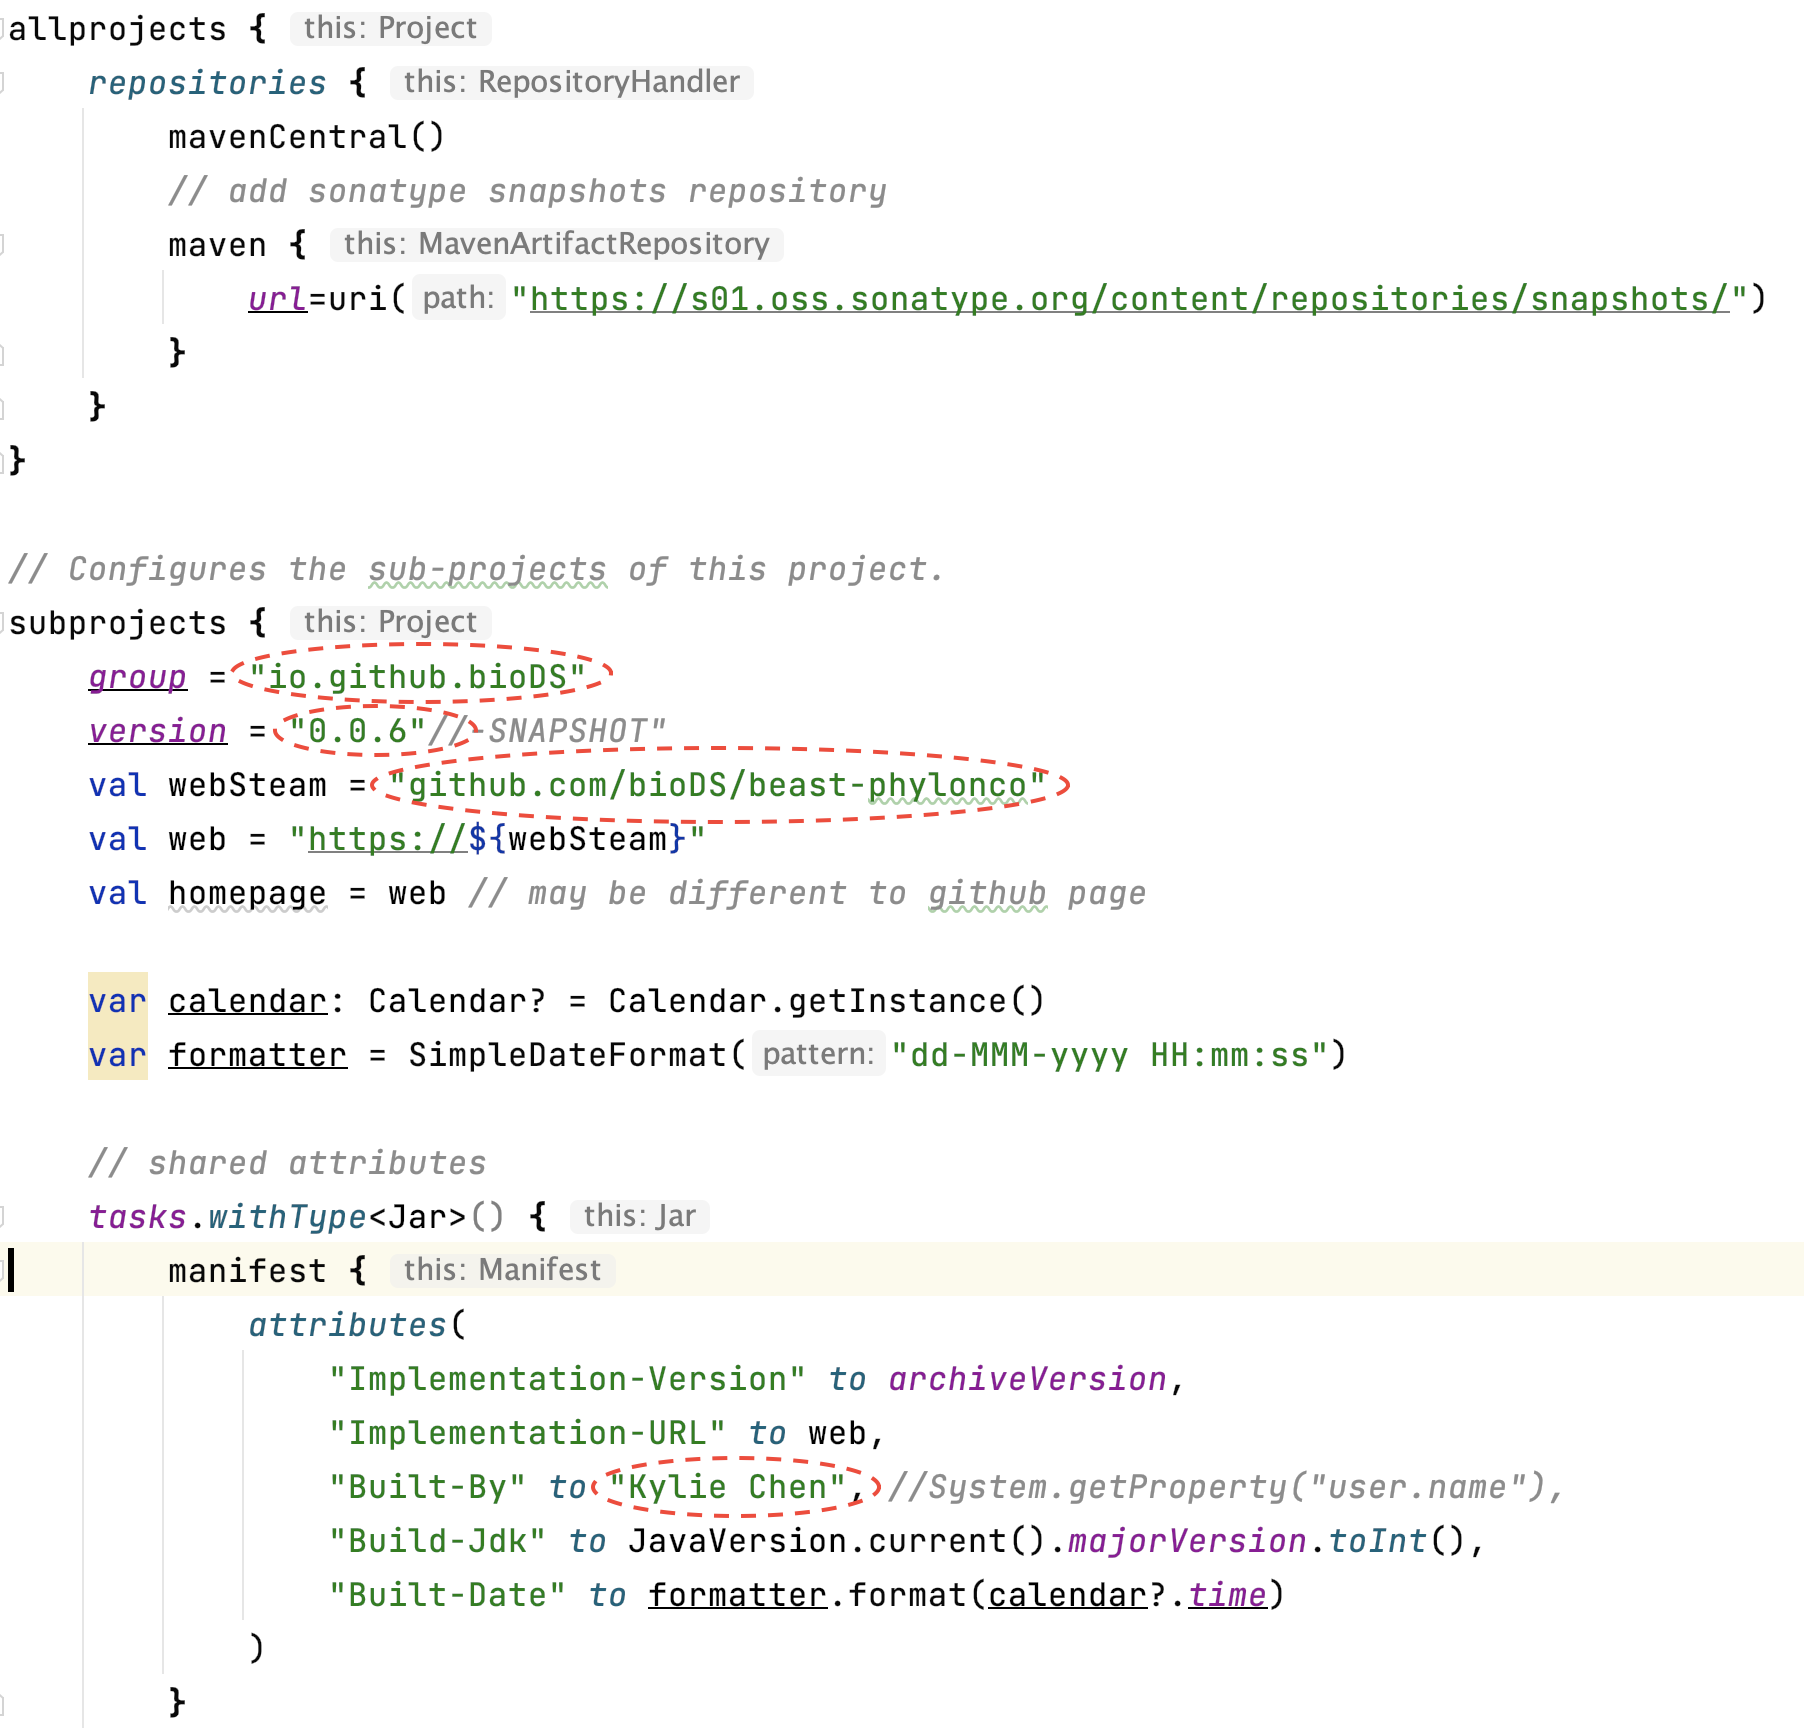
You can simply copy this build from the original file
and replaced the circled texts.
Here the manifest block provides the common meta information shared in all released jar files from 3 subprojects.
There are more details about how to organise Gradle projects. But some articles suggest to stop using buildSrc, to use composite builds instead. Therefore, we configure these 3 subprojects to use composite builds.
Maven publication
If you are publishing to the Maven central repo,
in addition to the Figure 2,
you need to update the condition
if (!project.name.equals("phylonco-beast")), and replace the string “phylonco-beast” into your subproject
containing BEAST 2 extensions.
As we do not have any publishing code in subproject “phylonco-beast”,
it should be excluded from the search of “MavenPublication” to avoid a null exception.
You also need to update another condition
including the “MavenPublication” whose name starts with “phylonco”.
This name is created by the code create<MavenPublication>(project.name)
in the publications block in each subproject build to use the subproject name.
Furthermore, you need to replace the project metadata in the publications block in each subproject build,
such as, the description
and developers
in “phylonco-lphy” build,
and same places in
“phylonco-lphybeast” build.
If you are not using the Maven central repo,
you can remove all related code from the afterEvaluate block in the root build,
and publishing blocks in each subproject build, as well as the related Gradle plugins.
2. phylonco-lphy
The subproject “phylonco-lphy” contains LPhy extension classes, which uses Java 17, Java module system, and the standardised extension mechanism using SPI.
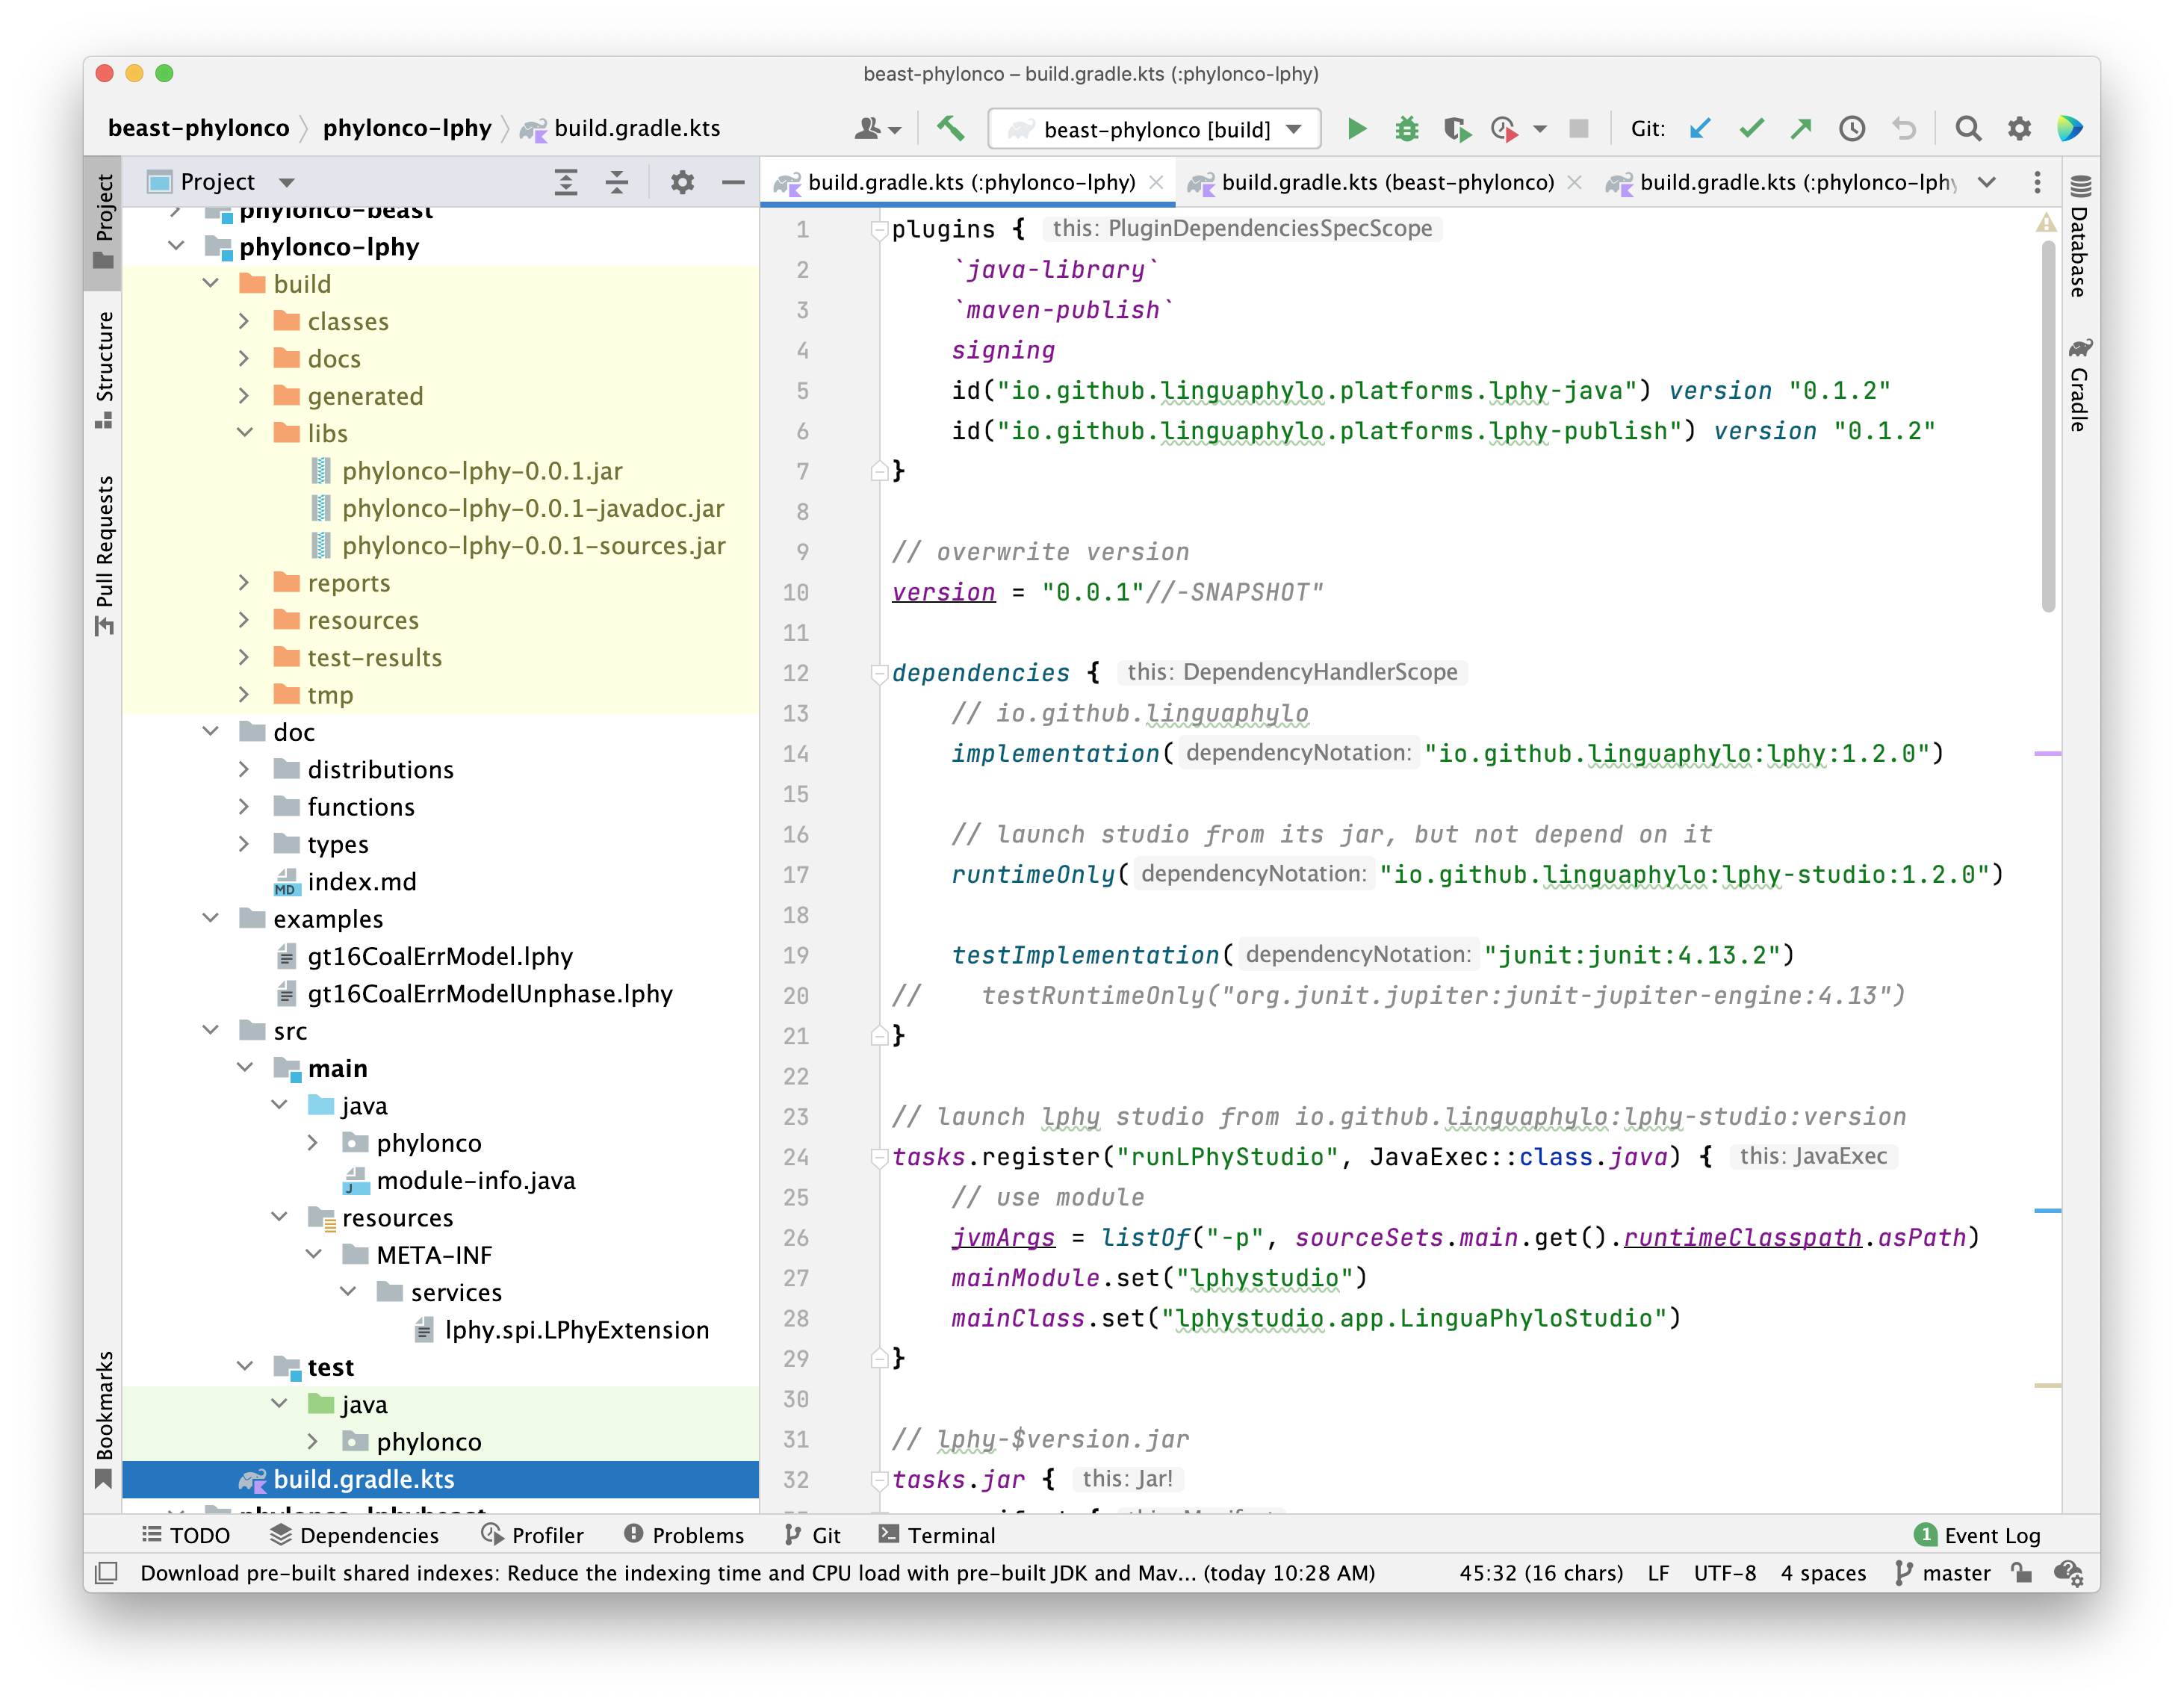
On the left side of the figure, it shows the required subproject structure.
The doc folder contains automatically generated LPhy language reference.
The examples folder contains the example LPhy scripts (*.lphy).
It is important to keep the examples folder under the “lphy” subproject,
LPhy studio will look for this path to list scripts under the working directory (user.dir)
when it starts.
The subfolder src/main/resources/META-INF/services has a provider configuration file.
The details are available in another tutorial
Java extension mechanism of LPhy and LPhyBEAST.
On the right side of figure, it is the build file for this subproject.
Gradle plugins
The first block plugins { } lists the required Gradle plugins,
where platforms.lphy-java and platforms.lphy-publish define the LPhy extension conventions,
such as using Java 17, and share the build logic, such as using module path to launch application.
Their source code and usage are avaiable at LinguaPhylo/GradlePlugins.
3. phylonco-beast
The subproject “phylonco-beast” contains the extension of BEAST 2 classes, which uses Java 1.8 and non-module system. The extension mechanism was developed by BEAST 2 core developers.
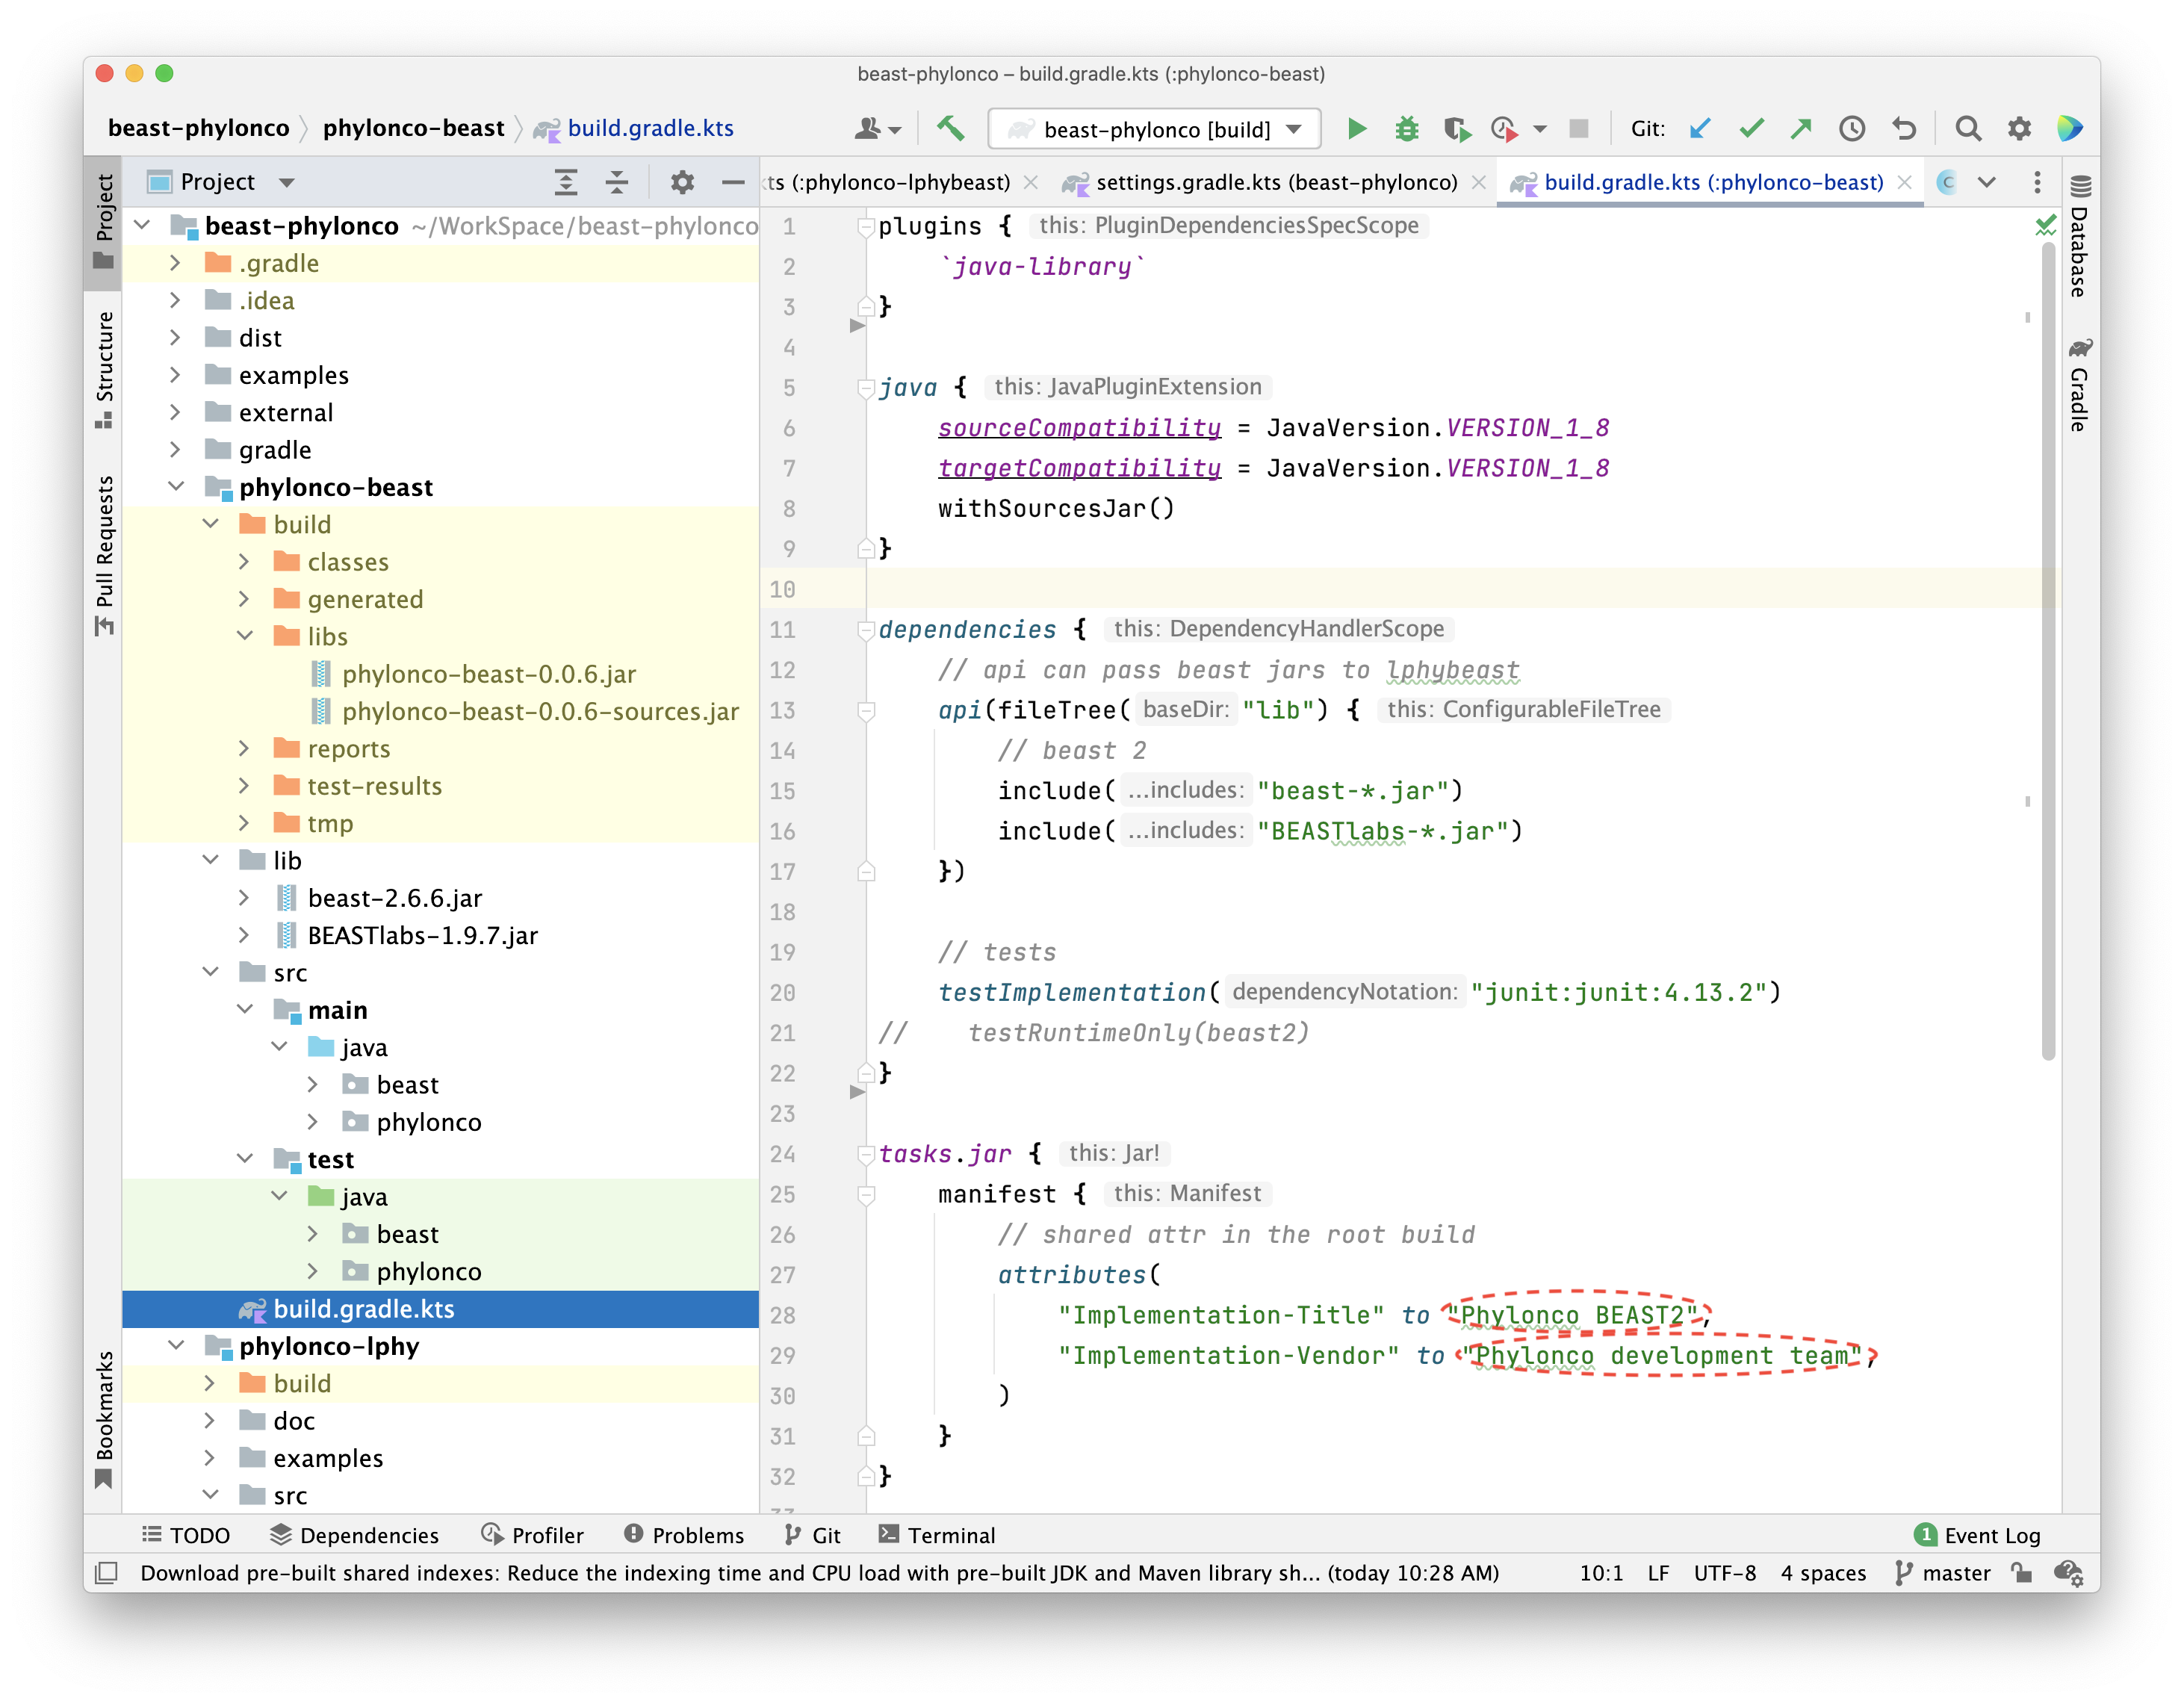
On the left side of the figure, there is an additional lib folder,
which is used to contain the required BEAST 2 libraries.
The BEAST 2 example XMLs and BEAUti templates are located in the project root in this case,
but you can also keep them in this subproject for convenience.
Java version and jar manifest
We are not using platforms.lphy-java plugin, so we have to define the required Java version using java { } block.
On the right side of figure, the
build file,
shows this subproject uses Java 1.8 to compile source,
and the generated class file can be run on Java 1.8.
Please replace the manifest attributes circled in Figure 4 into your project information.
4. phylonco-lphybeast
The subproject “phylonco-lphybeast” contains the mapping classes between BEAST 2 extension classes and LPhy extension classes.
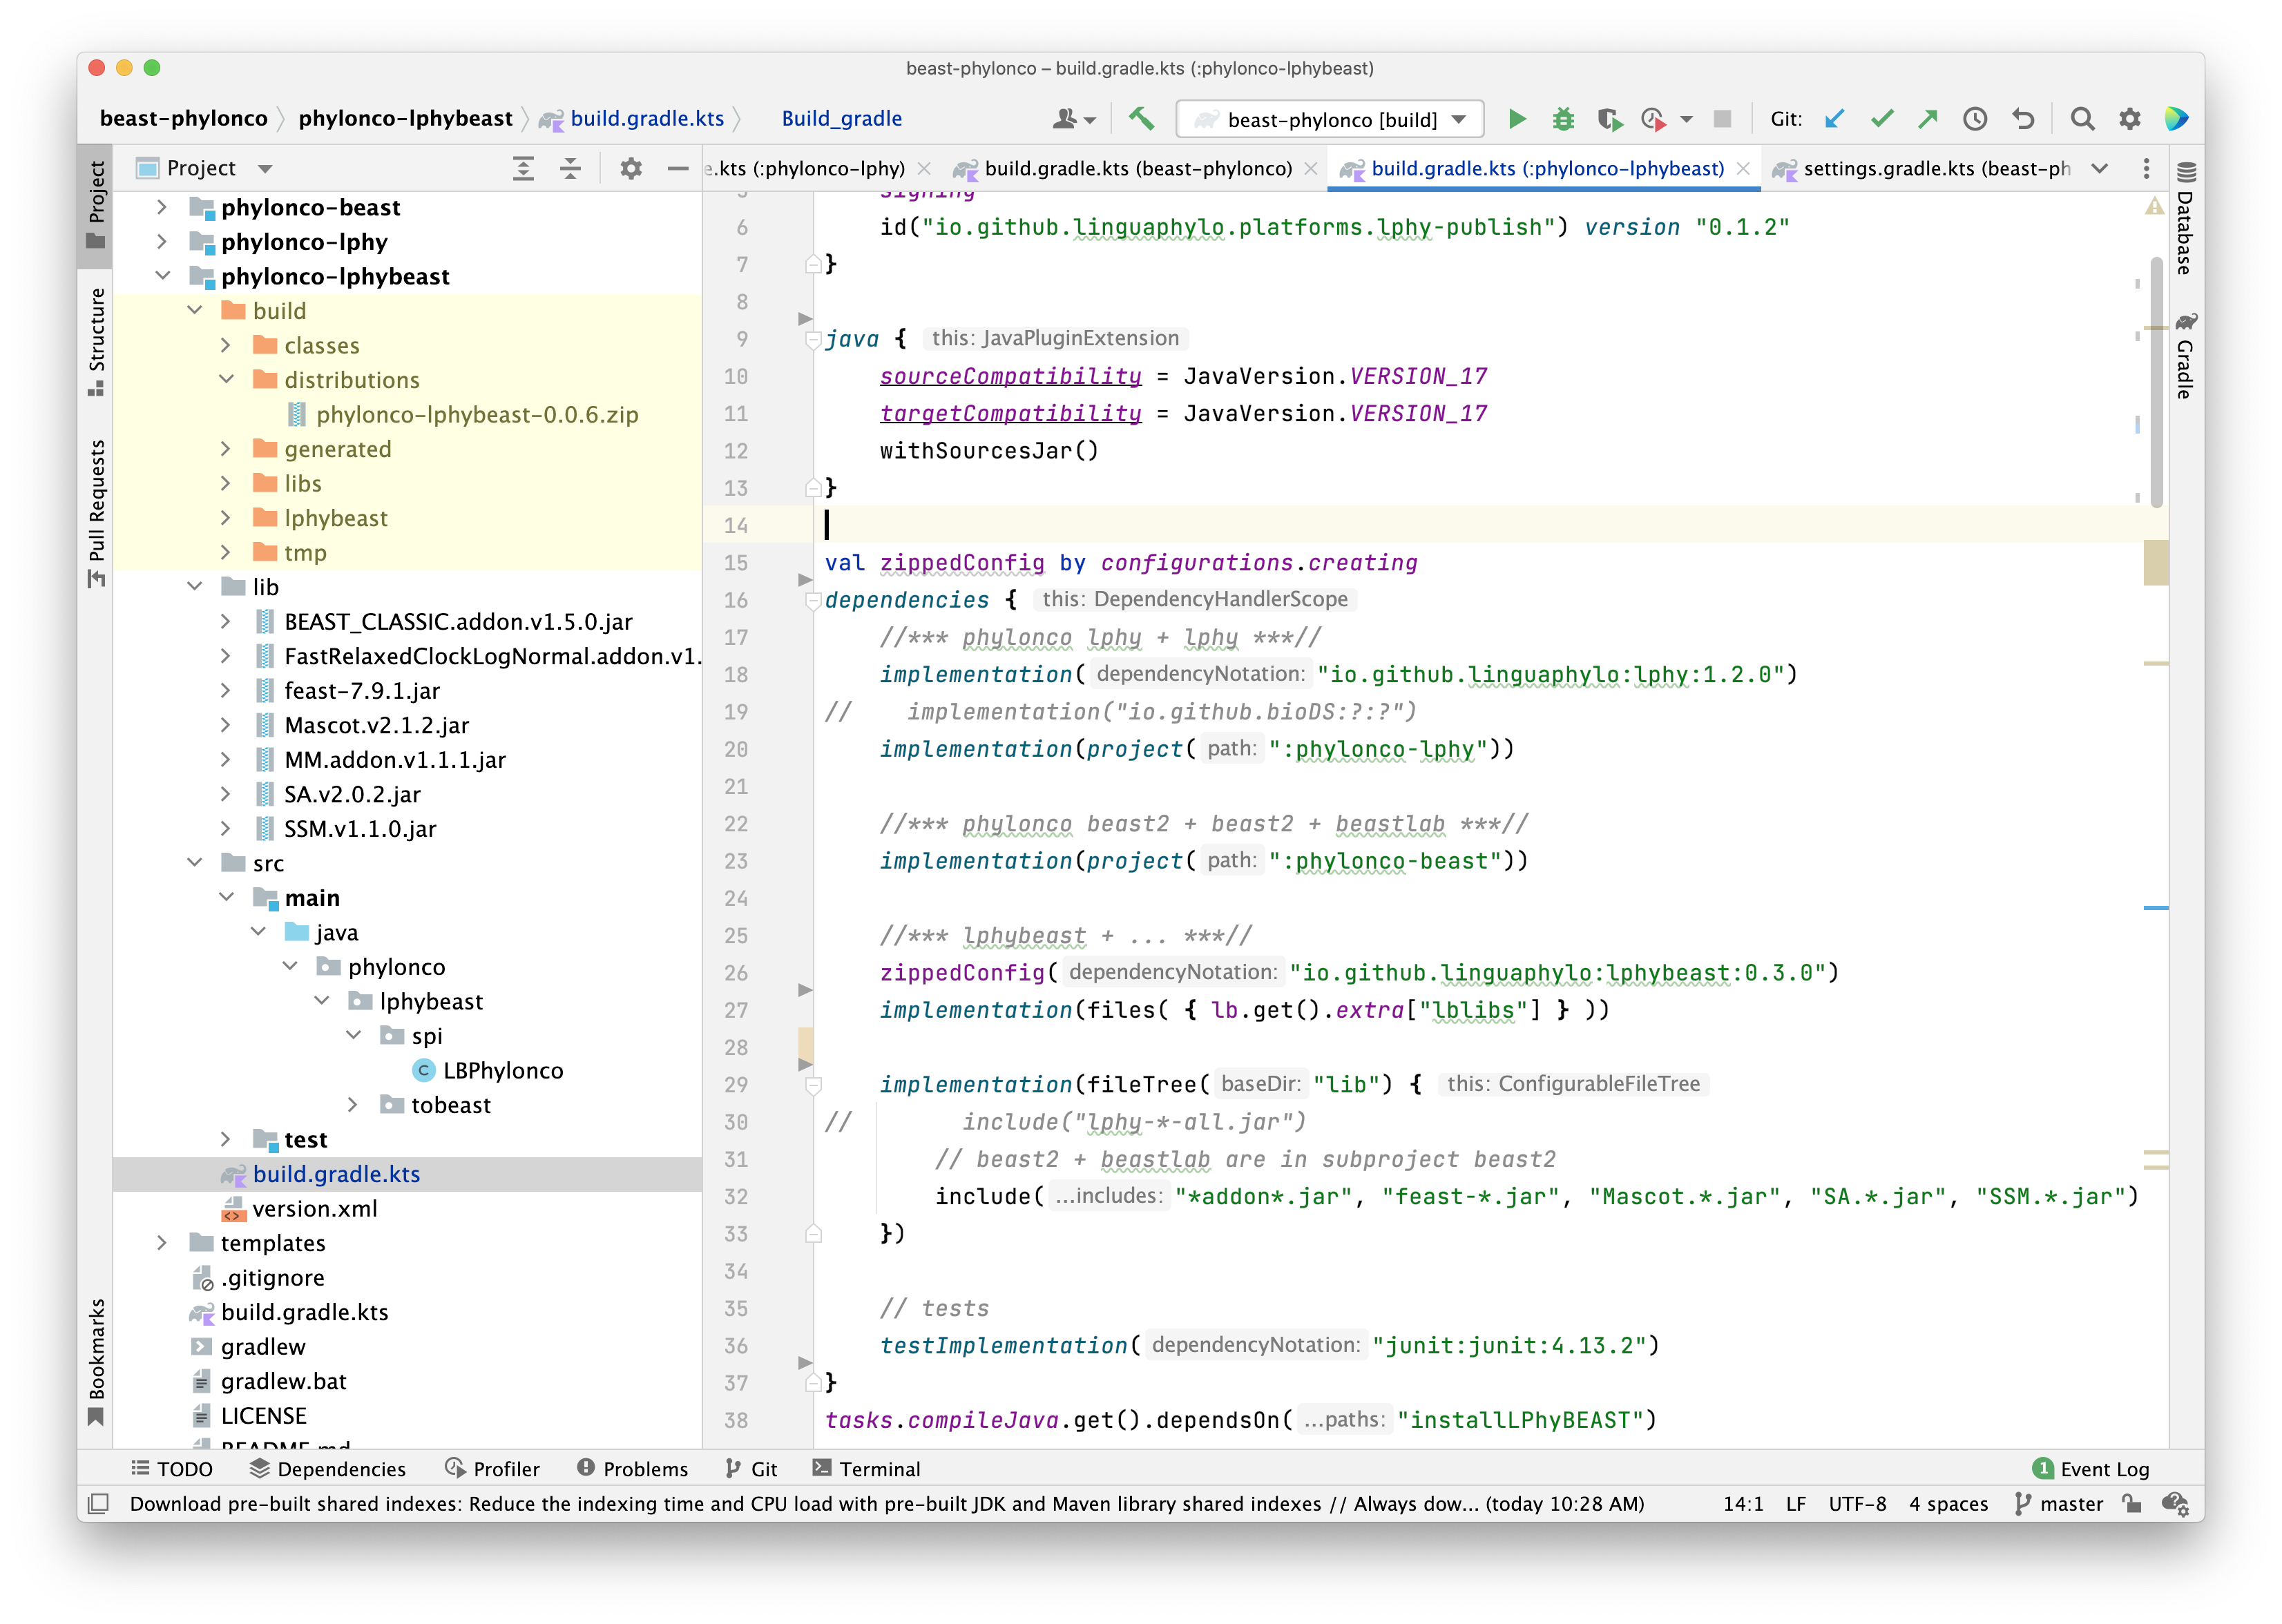
On the left side, it shows the similar structure as the subproject “phylonco-beast” except
version.xml.
This file is required by the BEAST 2 extension mechanism containing the dependencies of BEAST 2 packages.
It is stored in this subproject, because we are releasing the subproject “phylonco-beast” and “phylonco-lphybeast”
as one BEAST 2 package.
If you propose to release these 2 subprojects separately, you need to add another version.xml into
your BEAST 2 extension subproject, and also create another distribution block in its build to make the release.
On the right side, the
build file
uses java { } block to require Java 17.
Jar manifest and distribution
Please replace the manifest attributes into your project information.
This subproject build has an extra
distribution block,
which archives libraries and other files (e.g. docs and examples).
You need to replace the distribution contents for your project.
In phylonco-lphybeast distribution,
we include the phylonco-beast-*.jar, phylonco-lphy-*.jar and phylonco-lphybeast-*.jar
into a lib folder in the zip file,
where the jar is respectively generated by the jar task in each of their builds,
where the * represents the version of each jar.
The rest of code is to include all supporting files, such as version.xml, source code, examples, etc.
It will trigger the default distZip task in the distribution plugin,
to create a zip file containing these contents in a pre-defined struture.
The file name will concatnate the subproject name with version, for instance, phylonco-lphybeast-0.0.6.zip.
But this task will add “phylonco-lphybeast-$version” in the front of all relative paths of contents inside zip,
which breaks the BEAST 2 extension mechnism during unzipping.
So the next task
is used to remove this prefix.
5. Build directory structure
Gradle will automatically create a build folder for each build to contain the output of tasks.
They are coloured in red by IntelliJ project viewer, which means to be ignored by git.
Expanding the build folders in every subprojects, you can find the similar structure:
- The
libscontains all jar files. - The
distributionscontains the zip or tar files. - The
reportsandtest-resultscontain unit test results.
In the subproject “phylonco-lphybeast” build folder, there is a special folder lphybeast,
which contains all the contents from the released zip file of lphybeast core.
Their libraries will be used in the dependencies.
The detail is explained in the advanced tutorial dependencies.